
You bought one, and now you want to know how to clean the Honeywell Air Purifier. Honeywell’s goal since 1095 has been to ensure that you and your loved ones breathe healthy air. And they’ve stayed true to this promise ever since.
Despite the stiff competition from rivals like Germ Guardian and Levoit, Honeywell still pioneers the air filter market, making the best air purifiers that money can buy.
In a way, Honeywell’s air purifiers are progressive in design and innovation, with every new model more advanced than the earlier version. Sleek in design, optimized for performance, and powerful enough to clean as much air as possible, every air purifier in the Honeywell category can get the job done right.
With a Honeywell air purifier, you can easily clean up smells, molds, pet dander, and dust quickly. After every air purification cycle, the indoor air ends up fresh, leaving your room smelling fresh like Christmas.
Content Summary
The Composition
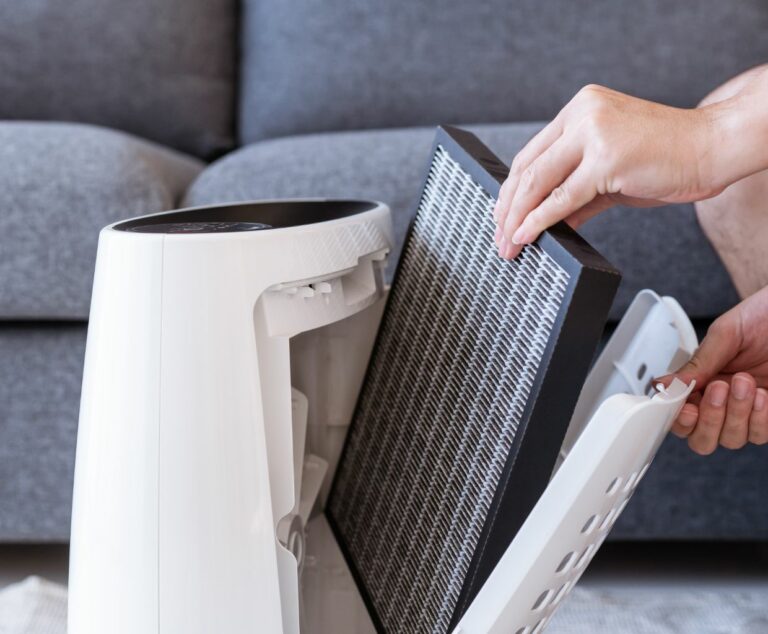
Almost all Honeywell air purifiers have four filters:
- A washable pre-filter sucks up dirt and dust and begins the cleanup process.
- An odor lock carbon filter detects awful odors and freshens up the air in the room.
- A True HEPA filter cleans up tiny dust particles, usually as small as 0.3 microns.
- And an electronic ionizer that also helps in the air purification process.
Together, these filters diagnose air quality in your room, collect dirt and debris, clean up the air, and then release it in its highest quality form so you and the rest of your family can breathe healthily. But as powerful as these air purifiers are and as significant as the role they play, they demand regular maintenance if they must continue to work well.
Let me put it this way:
If you run a Honeywell air purifier in your home, the filters will get dirty and need thorough cleaning and replacement.
How to Clean Honeywell Air Purifier the Right Way
-
Start by Cleaning the Outer Parts
Cleaning the outer parts of an air purifier daily is a few minutes of work to add to your chores list. But a task as simple as dusting the outer parts of the device while paying close attention to the vents will ensure you have less dirt to deal with when it’s time to clean the filters.
And by the way, cleaning the exteriors is easy. You only need a damp towel or a soft rag, and you’re good to go.
-
Don’t Just Replace the Filters, and First Know When to Replace Them
It’s important to note that Honeywell air purifiers don’t come with additional filters. This means you’ll need to buy them separately. And it’s essential to do that only when the time is right.
It’s OK to replace the filters every month if you want to. But that would be overkill. Change the True HEPA filter every three years. And have a new pre-filter fixed to the device every 3 to 6 months.
-
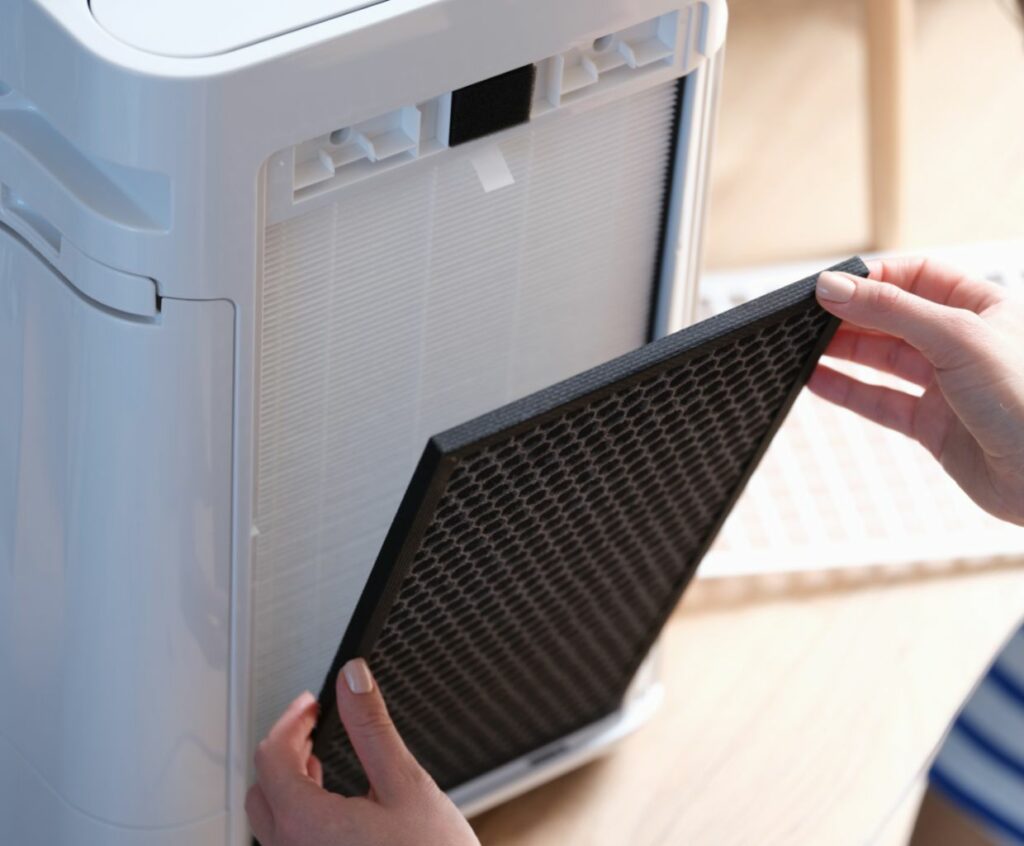
Clean the Pre-filters
There will always be a lot of dirt in the pre-filters because that’s where the purification occurs. As such, you need to try as much as you can to clean the filters regularly.
If you can do that every 30 days, that would be great. But if you feel like that’s too soon, you can schedule the cleaning at least every 2 or 3 months. The goal here is simple: ensuring that the unit runs smoothly month after month.
Follow these simple steps to clean the pre-filters:
- First, turn your Honeywell air purifier off and remove the pre-filters one after the other.
- Shake the filter gently to remove dirt and debris. Check if you’ve successfully removed all dirt with a simple shake.
- Next, use warm water to clean the filters even further. This will help to get rid of remaining dirt, especially those that are stuck. You may need to scrub gently to remove all the dirt, particularly the ones that are a bit sticky.
The last step in cleaning is to take the pre-filter outside so it can dry. You must ensure it dries completely before putting it back in place.
- Read Also: Are humidifiers suitable for dogs
Frequently Asked Questions
-
Can I vacuum the filters instead?
Yes, you can vacuum the filters instead of cleaning them with soap and water. The process is as simple as removing the filters from the cleaner, shaking off excess dust, and then vacuuming.
-
How will I know I’ve vacuumed properly?
As you continue to vacuum the filter, the screen color of the air purifier will turn from gray to white, which is the exact color it should be. All you have to do now is to fix the filter back in place, and it is ready to use again.
-
How often should I check the filters of my Honeywell air purifier?
I recommend checking the filters occasionally to see if they’re still in good condition. If they’re white, you know it’s time to clean them. You know it’s time to give them a touchup if they’re grayish.
-
What’s the other way to know when to clean the Honeywell air purifier?
It’s important to note that some Honeywell air purifiers have built-in LED light indicators that light up when it’s time to clean up the filter. You need to respond to this alert accordingly and clean the filters thoroughly. Otherwise, the device will fail to work correctly – or stop functioning altogether.
Clean Honeywell Air Purifier – Final thoughts
As you can see, cleaning a Honeywell air purifier is not as complicated as you might think it is. And the best part is that this will only take a few minutes.
So, the next time you notice your air purifier is not working correctly, all you have to do is remove and clean the filters correctly.